

![Swim Nappy Bundle [Ship Oct 5 - 10] - Mimi & Co](http://mimiandco.com.au/cdn/shop/files/swim-nappy-bundle-ship-oct-5-10-5796576.jpg?v=1770171125)

![Toilet Training Undies Pants [Jan Preorder] - Mimi & Co](http://mimiandco.com.au/cdn/shop/files/toilet-training-undies-pants-jan-preorder-6316642.jpg?v=1766216229&width=1200)
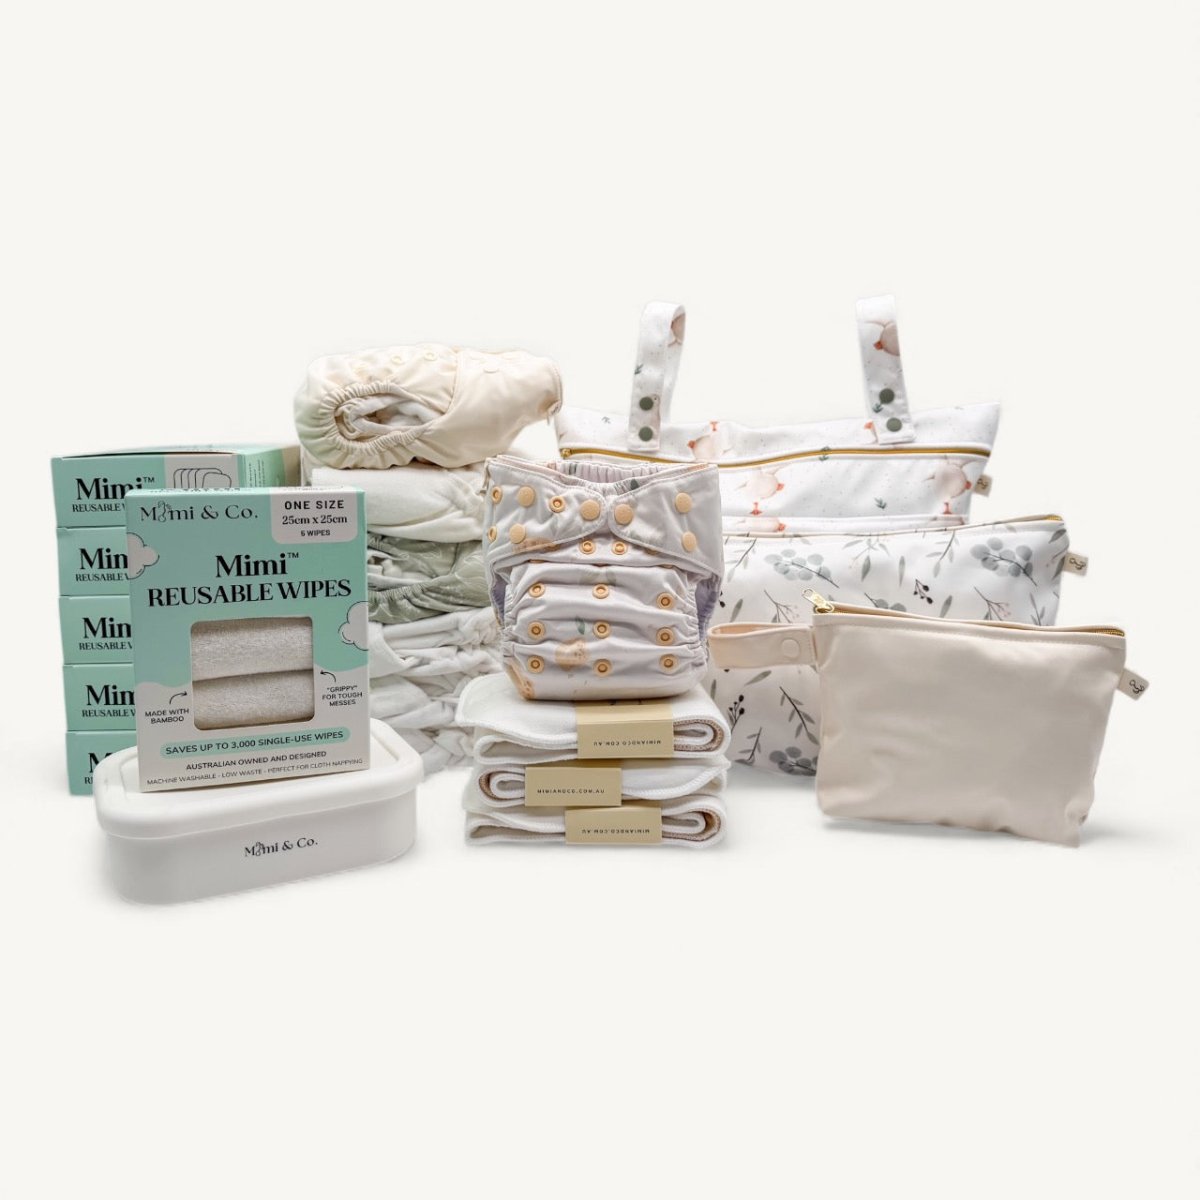
![Reusable Bamboo Mimi™ Wipes [5 Pack] - Mimi & Co](http://mimiandco.com.au/cdn/shop/files/reusable-bamboo-mimi-wipes-5-pack-7600782.jpg?v=1773649075)


![Reusable Mimi® Menstrual Underwear [Shipping 31/9] - Mimi & Co](http://mimiandco.com.au/cdn/shop/files/reusable-mimi-menstrual-underwear-shipping-319-6508918.png?v=1776734572)


![Tiny Transitions™ Training Undies [January Preorder] - Mimi & Co](http://mimiandco.com.au/cdn/shop/files/tiny-transitions-training-undies-january-preorder-9963304.jpg?v=1768434261&width=104)


![Travel Bamboo Change Mat [Ships March 14th] - Mimi & Co](http://mimiandco.com.au/cdn/shop/files/travel-bamboo-change-mat-ships-march-14th-1490896.jpg?v=1769606287&width=104)


![Reusable Bamboo Mimi™ Wipes [10 Pack] - Mimi & Co](http://mimiandco.com.au/cdn/shop/files/reusable-bamboo-mimi-wipes-10-pack-2507756.jpg?v=1773666247&width=104)


The Complete Guide to Fitting Night Nappies
Get the Perfect Fit for Leak-Free Nights
A perfectly fitted night nappy is the secret to dry mornings. Even the most absorbent nappy will leak if it doesn't fit right! The good news? Once you know what to look for, getting a great fit is easy.
This guide will walk you through fitting both our night nappy styles step by step, so you can say goodbye to leaks and hello to peaceful sleep.
Why Fit Matters So Much
Think of your night nappy like a rain jacket. The best, most expensive rain jacket in the world won't keep you dry if it has gaps at the neck or wrists! Same thing with nappies.
A good fit means:
- No gaps where wetness can escape
- Snug but comfortable elastic around legs and waist
- All absorbent material tucked inside
- Even coverage all around baby's bottom
- Room for baby to move and sleep comfortably
Let's start with our most popular night nappy...
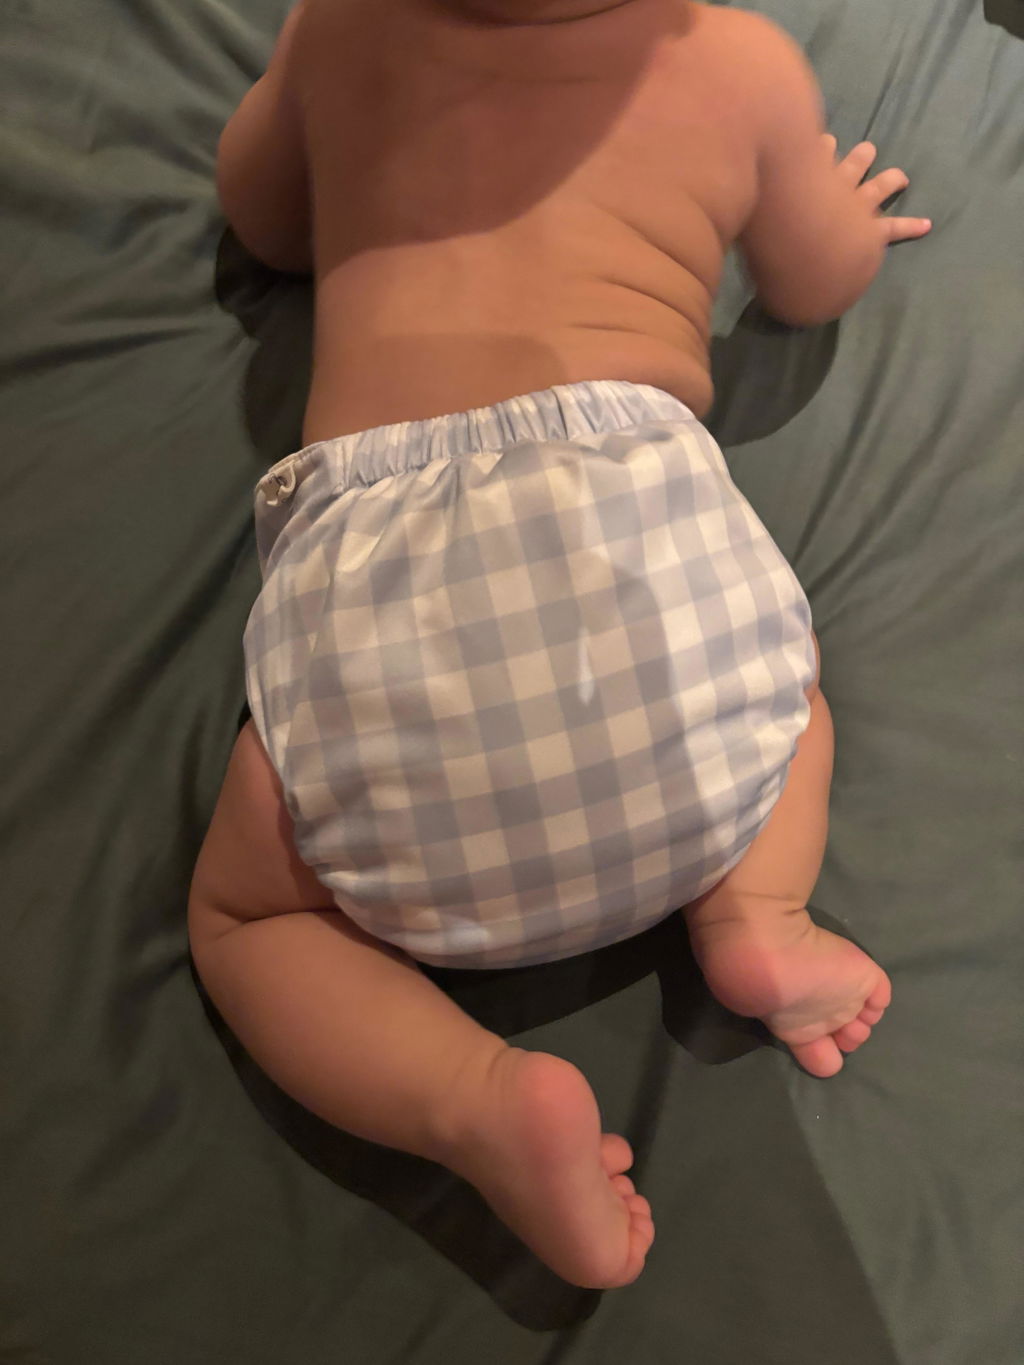
PART 1: Fitting the Mighty Minky Night Nappy
About the Mighty Minky
Our Mighty Minky Night Nappy is an all-in-one pocket nappy designed for average wetters. It has a built-in waterproof layer, so you don't need a separate cover. This makes fitting easier because there's only one layer to adjust!
Size range: 3.5kg to 19kg (about 8 pounds to 42 pounds)

Step-by-Step: Fitting the Mighty Minky
Step 1: Prep Your Nappy
Before you even put it on baby, make sure:
✓ Your Insert is folded and ready
✓ The insert is fully tucked into the pocket (nothing sticking out!)
✓ Any boosters are layered inside
✓ The nappy is unsnapped and laid flat
Important: Make sure no fabric is sticking out of the pocket opening! Even a tiny bit of insert poking out will wick wetness right out of the nappy.

Step 2: Position Baby
Lay baby on their back on a safe changing surface.
Pro Tip: Have everything ready before you lay baby down. Night nappies are bulkier than day nappies, so they take a bit longer to put on. Having toys or a book handy helps keep baby still!
Step 3: Place the Nappy
Slide the nappy under baby's bottom. The back of the nappy should come up to baby's waist.
How high should it be?
- The top of the nappy should sit just below baby's belly button in front
- In the back, it should cover most of their bottom and come up to their waist
- If it's too low, you'll get back leaks
- If it's too high, it might be uncomfortable
For boys: Make sure everything is pointed DOWN before you close the nappy!
Step 4: Adjust the Rise (Length)
The Mighty Minky has snap-down rise settings to adjust the length as baby grows.
Finding the right rise:
Look at the front of the nappy. You'll see three rows of snaps at the top.
Smallest setting (newborns/small babies):
- Snap down all three rows
- This shortens the nappy for tiny bottoms
- Use when baby is 3.5kg-6kg
Medium setting (most babies):
- Snap down two rows
- Leave the top row unsnapped
- Use when baby is 6kg-12kg
Largest setting (bigger babies/toddlers):
- Snap down one row OR leave all unsnapped
- This gives maximum length
- Use when baby is 12kg+
How to tell if rise is right:
- Should not have excess fabric bunching up
- Should cover baby's bottom completely
- Legs should move freely
- Should not be pulling tight in the crotch
Step 5: Pull Up and Center
Pull the front of the nappy up between baby's legs and center it on their tummy.
Getting it centered:
- Equal amounts of fabric on each side
- The center seam should run straight up the middle
- Wings should be even on both sides
Check the leg holes:
- Elastic should sit in the crease where baby's leg meets their body
- Not on the thigh, not on the hip - right in the crease!
- This is where the seal happens
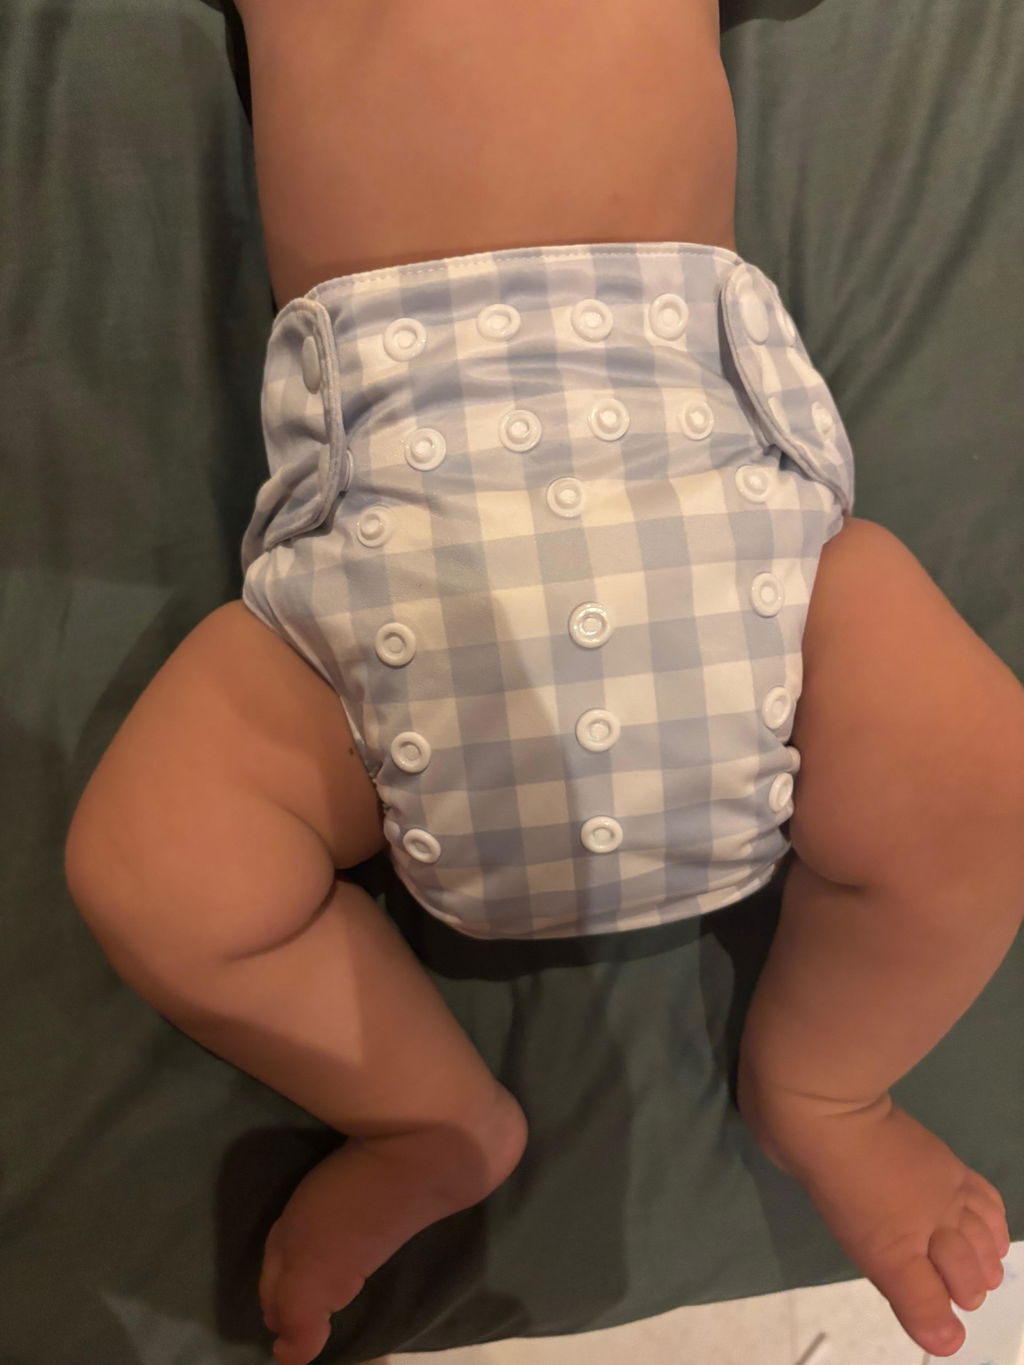
Step 6: Snap the Waist
Time to snap! The Mighty Minky has multiple snap settings so you can get a custom fit.
Hip snaps first:
- Hold the nappy centered on baby's tummy
- Pull one wing across (don't pull super tight!)
- Choose a snap setting that's snug but not tight
- Snap it closed
- Repeat on the other side
Overlap is okay! For smaller babies, the wings will overlap a lot in the middle. That's normal and actually gives you more snap options.
Which snap to use?
- The snaps are in rows across the front
- For a tighter fit: use the inner snaps (closer to center)
- For a looser fit: use the outer snaps
- You might use different settings on each side if baby is wiggly or uneven
Two-finger test: You should be able to fit two fingers between the nappy and baby's tummy at the waist.
- Can't fit two fingers? Too tight!
- Can fit your whole hand? Too loose!

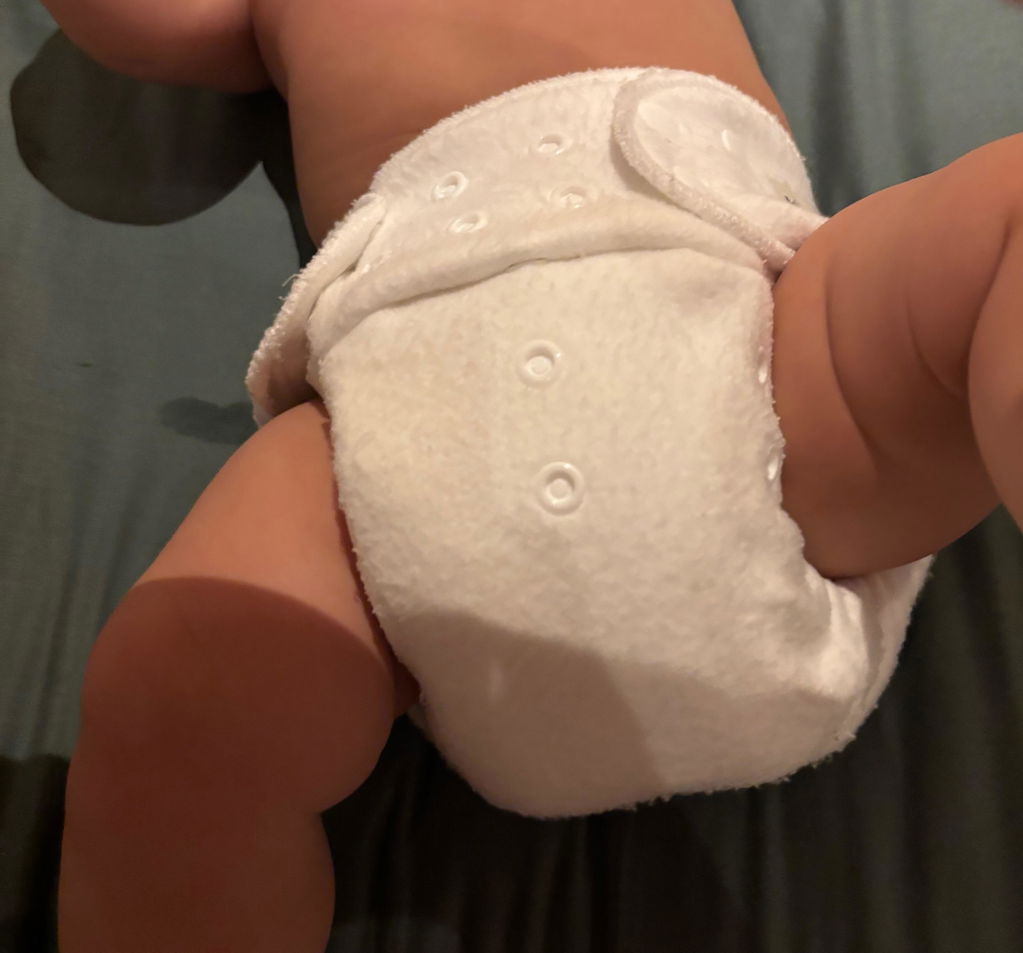
Step 7: Check the Leg Elastic
This is the MOST IMPORTANT part for preventing leaks!
Run your finger around each leg opening:
✓ Elastic should sit snugly in the crease where leg meets body ✓ Should not have any gaps ✓ Should not be cutting into baby's thigh (red marks = too tight!) ✓ Fabric should not be bunched under the elastic ✓ Should be able to fit one finger under the elastic
Common leg fit problems:
Problem: Gaps at the legs Fix:
- Try a different snap setting (usually tighter)
- Adjust the rise shorter
- Make sure you pulled the elastic into the leg crease
- Might need a smaller rise setting
Problem: Red marks on thighs Fix:
- Loosen the waist snaps one setting
- Check the rise isn't too short
- Make sure elastic isn't twisted
Problem: Elastic is twisted Fix:
- Unsnap and start over
- Smooth out the elastic before snapping closed
- Make sure nappy was centered when you pulled it up
Step 8: Do the Final Check
Before you put baby's PJs on, do these quick checks:
□ Two-finger test at waist - Not too tight, not too loose
□ Run finger around both legs - Elastic in the leg crease, no gaps
□ Check the back - Nappy comes up high enough to cover bottom
□ Look for bunching - Fabric should be smooth, not bunched up
□ Tug test - Gently tug the nappy. It should stay in place and not slide down
□ Check the pocket - No insert fabric poking out anywhere
□ Movement test - Baby should be able to move legs freely

Step 9: Dress Baby
Night nappies are bulkier than day nappies, so you might need:
- Bigger PJs (size up!)
- Sleep sacks instead of fitted PJs
- Stretchy pants
- Looser clothing
Pro Tip: If PJs are too tight, they can compress the nappy and cause leaks! The absorbency needs room to work.
Troubleshooting Common Mighty Minky Fit Issues
Issue: Leaking at the Legs
Check:
- Is the elastic sitting in the leg crease or on the thigh?
- Are there gaps when baby moves?
- Is the rise too long (too much fabric bunching in the crotch)?
- Are the inserts poking out?
Fix:
- Adjust to a smaller rise setting
- Try different waist snaps for a snugger fit
- Make sure elastic is tucked into the crease
- Double-check pocket is fully closed
Issue: Leaking at the Back
Check:
- Does the nappy come up high enough in the back?
- Is it sliding down during the night?
- Is baby a back sleeper? (More pressure on the back)
Fix:
- Use a longer rise setting
- Tighten the waist snaps
- Add more absorbency toward the back
- Make sure waist elastic is snug at the back
Issue: Red Marks on Baby's Skin
Red marks that fade in 20 minutes are normal (like sock elastic marks). But deep red marks that last mean the nappy is too tight.
Fix:
- Loosen waist snaps by one setting
- Check the rise - might be too short for baby's current size
- Make sure elastic isn't twisted
- Try the next rise setting up
Issue: Nappy Feels Saggy or Loose
Fix:
- Tighten waist snaps
- Try a shorter rise setting
- Make sure you're using enough absorbency (heavy nappy = better fit)
- Check that snaps are on the right setting for baby's size
Issue: Can't Get Snaps to Reach
If the wings can't reach across to snap, baby might be ready for the next size up... but wait! The Mighty Minky fits up to 19kg. Try these first:
Fix:
- Use the longest rise setting (unsnap all rises)
- Make sure nappy is pulled up high enough
- Try the outermost snap setting
- Check that you don't have too much absorbency (too bulky)
If baby is over 19kg, they might need our training pants instead!
Mighty Minky Fit by Age
Newborns (3.5kg-5kg)
- Use shortest rise setting (snap down all three rows)
- Wings will overlap a lot - that's normal!
- Use innermost snaps
- Might look big at first - they'll grow into it!
Young Babies (5kg-8kg)
- Usually medium rise setting (two rows snapped)
- Less overlap in the wings
- Leg fit gets easier as they chunk up
Bigger Babies (8kg-14kg)
- Often longest rise setting (one row snapped or none)
- Wings might barely overlap or not at all
- Sweet spot for fit!
Toddlers (14kg-19kg)
- Longest rise setting (nothing snapped down)
- Use outermost snap settings
- Might need to size up PJs
PART 2: Fitting the Heavy Wetter Fitted Night Nappy
About the Fitted Nappy System
Our Heavy Wetter Fitted Nappy is a two-part system:
- The absorbent fitted nappy (goes on first)
- A waterproof cover (goes over top)
This means you're fitting TWO layers, which takes a bit more practice. But don't worry - we'll walk through everything!
Size range: 5kg to 18kg (about 11 pounds to 40 pounds)

Understanding the Two-Part System
The Fitted Nappy:
- Made from absorbent bamboo and cotton
- Has NO waterproof layer
- Snaps closed with side snaps
- Can absorb TONS of liquid
- Needs a cover to keep clothes dry
The Cover:
- Goes OVER the fitted nappy
- Provides the waterproof protection
- Can be TPU/PUL covers or wool covers
- Must completely cover all the fitted nappy fabric
Step-by-Step: Fitting the Heavy Wetter Fitted Nappy
Step 1: Prep Your Fitted Nappy
Before putting it on baby:
✓ Have your snake inserts folded and ready
✓ Add any extra boosters you're using
✓ Layer everything inside the fitted nappy
✓ Have your waterproof cover ready nearby
✓ For wool covers, make sure it's freshly lanolised!
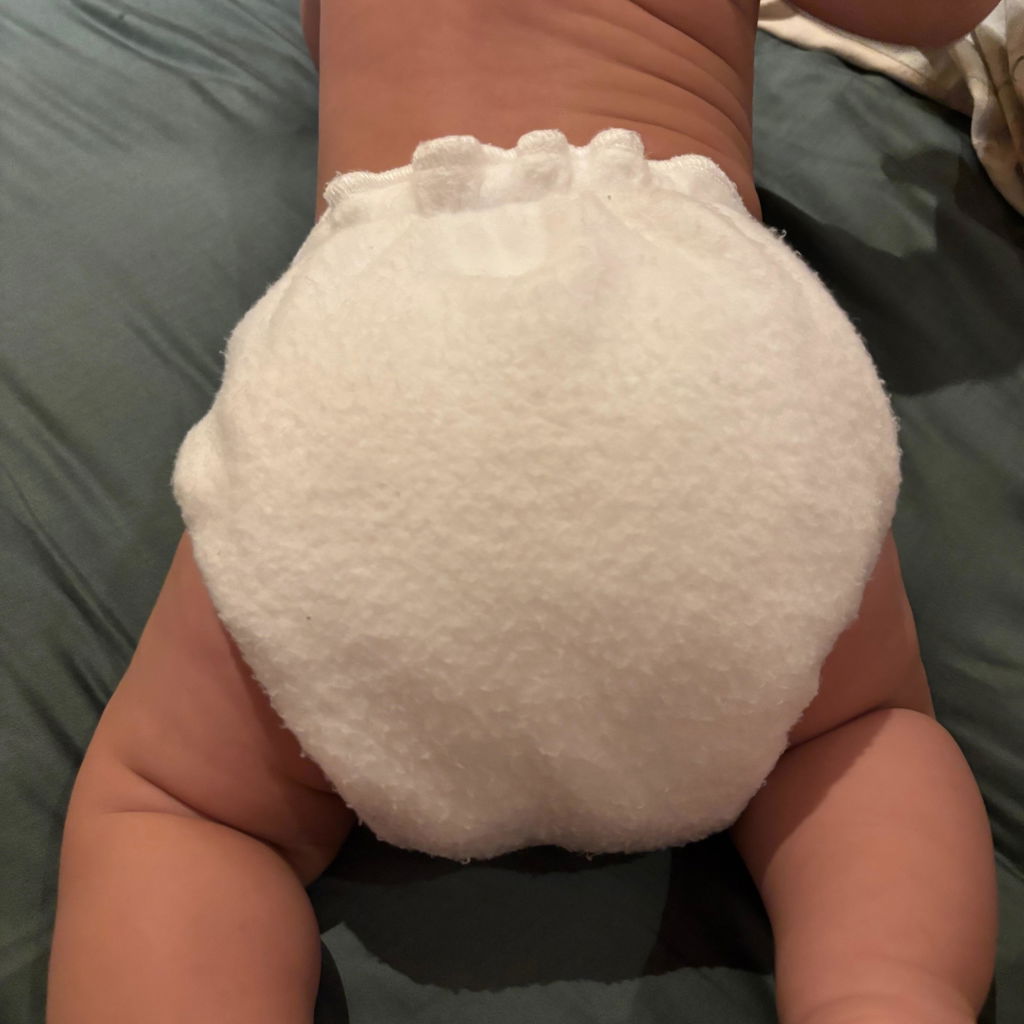
Important: Unlike pocket nappies, fitted nappies have the absorbency laying on top, not stuffed in a pocket. Make sure all inserts are positioned where baby needs them most!
![Heavy Wetter Night Nappy [Shipping 16/9] - Mimi & Co](https://cdn.shopify.com/s/files/1/0490/7827/2156/files/heavy-wetter-night-nappy-shipping-169-5280853.jpg?v=1759809467)
Step 2: Position Baby
Lay baby on their back. Because fitted nappies are bulkier, this might take a minute. Have a toy ready!
Step 3: Place the Fitted Nappy
Slide the fitted nappy under baby's bottom.
Positioning:
- Back of the nappy should come up to their waist
- Front should come up to just below their belly button
- All the absorbent layers should be centered under baby
- Make sure inserts stay in position as you lay baby down
For boys: Point everything DOWN!
Step 4: Adjust the Waist Snaps
The Heavy Wetter Fitted has crossover waist snaps that let you adjust the fit.
How the snaps work:
- The fitted has snaps at the waist that overlap
- You can adjust how tight or loose by choosing different snaps
- These control the waist fit
- They also help you adjust for different body shapes
Getting the waist right:
- Pull the front up between baby's legs
- Take one side wing and pull it across baby's tummy
- Find a snap that gives you a snug but comfortable fit
- Snap it closed
- Repeat with the other side
Two-finger test: Should fit two fingers at the waist.
Step 5: Adjust the Leg Snaps
This is what makes fitted nappies special - separate leg and waist adjustments!
The leg snaps:
- Located on the sides of the nappy
- Let you adjust leg tightness separately from waist
- Perfect for chunky thighs or skinny legs
Adjusting the legs:
- Look at the elastic around one leg
- Find the snaps on that side
- Choose a snap setting that makes the elastic snug in the leg crease
- Snap it closed
- Repeat on the other side
Each leg can be different! If baby has one chunkier thigh, use different snap settings on each side.
Step 6: Check the Fitted Nappy Fit
Before adding the cover, check the fitted:
□ Leg elastic in the crease - No gaps, snug but not tight
□ Waist is snug - Two fingers fit, not sliding down
□ All fabric tucked in - No insert fabric hanging out
□ Smooth fit - Not bunched or twisted
□ Complete coverage - Covers entire bum and front
□ Baby can move - Legs bend freely
Remember: The fitted nappy is NOT waterproof yet! You'll add the waterproof cover next.
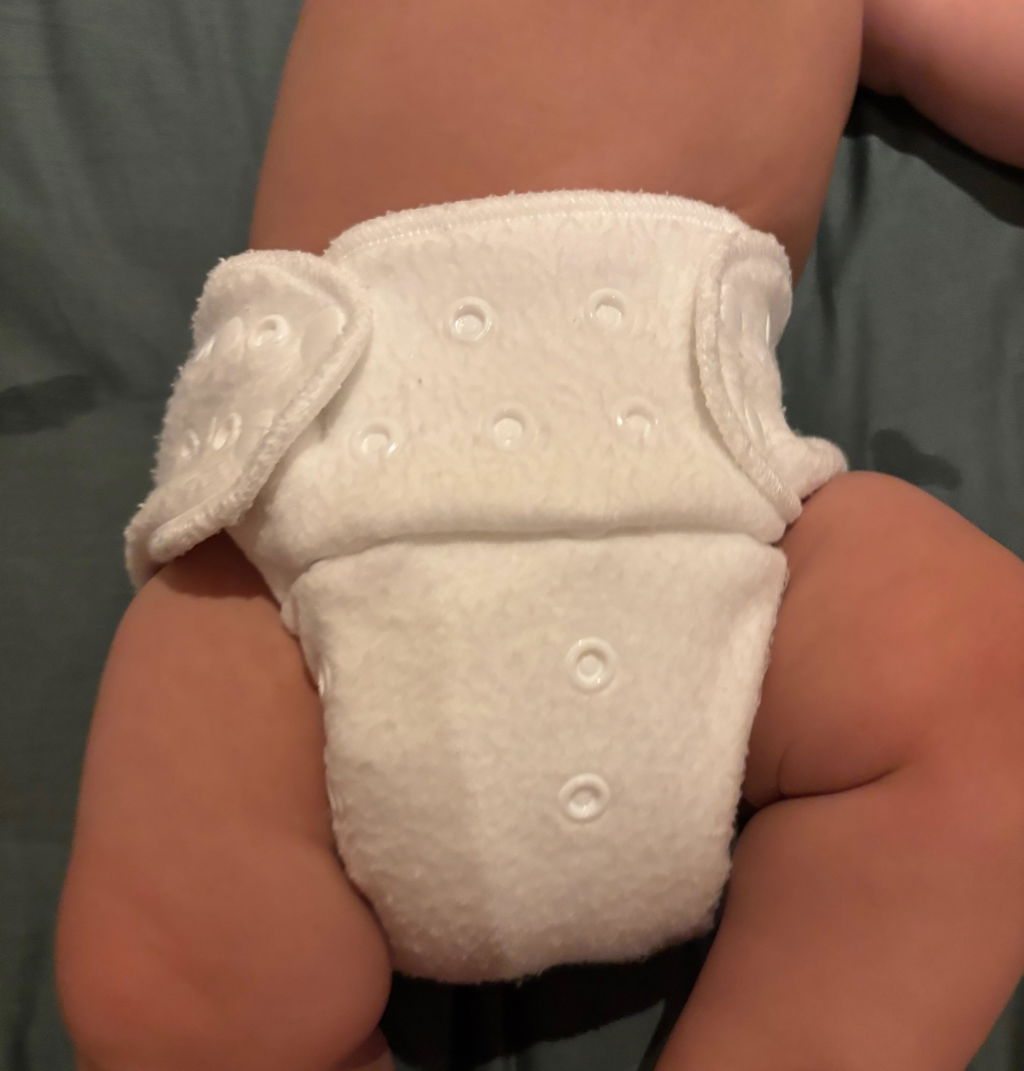
Adding a TPU/PUL Cover
TPU and PUL are both types of waterproof fabric. These covers are easy to use and quick to put on.
Step 1: Choose the Right Size Cover
Your cover must be big enough to completely cover the fitted nappy!
If any fitted fabric sticks out, you'll get leaks. The exposed fabric acts like a wick and pulls wetness out.
Rule: When in doubt, size up on the cover.
Step 2: Put On the TPU Cover
- Slide the cover under baby (fitted nappy is already on)
- Pull the cover up over the fitted nappy
- Make sure ALL the fitted fabric is tucked inside the cover
- Snap or velcro the cover closed
Critical check: Run your finger around the leg holes and waist. You should only feel the cover fabric, not the fitted nappy underneath.
![Heavy Wetter Night Nappy [Shipping 16/9] - Mimi & Co](https://cdn.shopify.com/s/files/1/0490/7827/2156/files/heavy-wetter-night-nappy-shipping-169-2718416.jpg?v=1759809467)
Step 3: Check for Gaps
The cover needs to seal around the edges:
✓ Legs: Cover elastic should sit in the leg crease, just like the fitted
✓ Waist: Cover should come up as high as the fitted
✓ Back: Check that the back of the fitted isn't sticking out
✓ Front: Make sure the front of the fitted is covered
Common TPU cover mistakes:
❌ Cover is too small - fitted fabric sticks out
❌ Cover isn't pulled up high enough in back
❌ Elastic isn't in the leg crease
❌ Cover is twisted or bunched
Step 4: The Tuck Test
This is the most important step!
Do this EVERY time:
- Run your finger all the way around each leg opening
- Tuck any fitted fabric back inside the cover
- Make sure only the cover fabric is showing
- Check the waist front and back
- Tuck, tuck, tuck!
Even a tiny bit of exposed fitted fabric will cause leaks.
Step 5: Final TPU Cover Check
□ Fitted nappy is completely covered by the TPU cover □ No fitted fabric is sticking out anywhere □ Cover elastic is snug (but not tight) around legs □ Cover comes up high enough on the waist □ Two fingers fit at the waist □ Baby can move comfortably
Pro Tip: The cover can be a bit looser than the fitted. It's the fitted that needs to be snug. The cover just needs to completely cover it!
Adding a Wool Cover
Wool covers are magical for nighttime! They're breathable, naturally antibacterial, and super gentle. But they work differently than TPU covers.
Important: Wool Must Be Lanolised!
Wool is only waterproof when it's been treated with lanolin. Lanolin is a natural wax from sheep that makes wool water-resistant.
Before using wool:
- Lanolise it following our lanolin guide
- Re-lanolise every 3-4 weeks
- If wool leaks, it probably needs more lanolin
- Wool should feel slightly waxy, not dry

Step 1: Choose the Right Wool Cover
Wool covers are very stretchy, so sizing is more forgiving!
Wool sizing:
- Usually covers a wider weight range than TPU
- Should fit over the fitted with room to spare
- Can be a bit loose - wool is forgiving
- Should still completely cover all fitted fabric
Step 2: Put On the Wool Cover
Wool is stretchy and easy to put on:
- Slide the wool cover under baby (fitted is already on)
- Gently stretch it over the fitted nappy
- Pull it up over the entire fitted
- Smooth it out
No snaps or velcro! Most wool covers are pull-on style. The stretch holds them in place.
Step 3: Check the Coverage
Just like with TPU, ALL the fitted fabric must be inside the wool:
✓ Run your hands around the leg openings
✓ Feel for any fitted fabric sticking out
✓ Tuck everything inside the wool
✓ Check the waist all around
✓ Smooth out any bunching
Wool difference: Wool is thicker and less "sticky" than TPU, so it's actually easier to keep fitted fabric tucked inside!
Step 4: Check the Fit
Wool fit is different than TPU:
□ Wool can be looser - It doesn't need to be tight
□ Ribbed edges - Wool often has ribbed edges that gently hug
□ All fitted covered - This is still the most important part!
□ Comfortable - Should not be pulling or digging in
□ Room to move - Baby should be able to roll and kick freely
Wool is forgiving! Even if it seems a bit loose, as long as it covers all the fitted fabric, you're good.

Step 5: The Wool Tuck Test
Same as TPU:
- Run your finger around each leg opening
- Make sure only wool is showing, not fitted fabric
- Check the waist front and back
- Tuck any fitted edges inside
- Smooth everything out
Step 6: Final Wool Check
□ Fitted nappy completely covered by wool
□ No fitted fabric poking out
□ Wool covers everything comfortably
□ Baby can move freely
□ Wool feels slightly waxy (lanolised properly)
Wool bonus: Wool breathes better than TPU, so baby often stays cooler and gets fewer rashes!
TPU Cover vs Wool Cover: Quick Comparison
| Feature | TPU/PUL Cover | Wool Cover |
|---|---|---|
| Waterproofing | Built-in, always waterproof | Needs lanolin treatment |
| Ease | Easier for beginners | Takes practice |
| Fit | Must be snug | Can be looser |
| Breathability | Less breathable | Very breathable |
| Bulk | Less bulky | Can be bulkier |
| Washing | Normal wash routine | Hand wash or wool cycle |
| Drying | Line dry | Lay flat to dry |
| Maintenance | Easy - just wash | Lanolise every 3-4 weeks |
| Night use | Great | AMAZING |
Our recommendation:
- New to cloth? Start with Wipeable Covers
- Ready for advanced? Try Wool Covers - they're worth it!
Troubleshooting Fitted Nappy Issues
Issue: Leaking Even Though Fitted Isn't Fully Soaked
Check the cover first!
✓ Is fitted fabric sticking out anywhere?
✓ Is the cover big enough?
✓ If using wool, is it lanolised?
✓ Are there gaps at the legs or waist?
Fix:
- Size up in covers
- Tuck, tuck, tuck all fitted fabric inside
- Re-lanolise wool covers
- Make sure cover comes up high enough
Issue: Hard to Get Fitted Snaps Closed
Fitted nappies are VERY bulky with all the absorbency!
Tips:
- Compress the absorbency slightly as you snap
- Make sure baby is lying flat
- Use the looser snap settings
- It's okay to have some bulk!
If you truly can't get it closed, you might need:
- To remove some absorbency (try fewer inserts)
- A bigger size (is baby over 18kg?)
Issue: Cover Won't Close Over Fitted
This means your cover is too small!
Fix:
- Size up in covers
- Try a different cover brand that runs bigger
- Remove one layer of absorbency if possible
- Make sure fitted is pulled up properly (not bunched low)
Remember: The cover should easily close over the fitted with room to spare. If it's pulling tight, it's too small.
Issue: Fitted Slides Down
Check:
- Are the waist snaps tight enough?
- Is the fitted too long for baby's current size?
- Are PJs or sleep sack pulling it down?
Fix:
- Tighten waist snaps
- Adjust leg snaps for a better fit
- Make sure clothing isn't too tight
- Try crossing the waist snaps differently
Issue: Red Marks from Fitted
Light pressure marks are normal and fade quickly. Deep red marks that last mean something's too tight.
Fix:
- Loosen the leg snaps
- Try different waist snap settings
- Make sure elastic isn't twisted
- Check that you're not using too much absorbency (over-stuffing)
Issue: Wool Cover Leaking
If wool leaks but the fitted inside is dry, it's NOT an absorbency issue - it's the wool!
Check:
- Has the wool been lanolised recently?
- Does it feel dry or waxy?
- Are there any thin spots or holes?
Fix:
- Re-lanolise the wool (this fixes 90% of wool leaks!)
- Make sure you used enough lanolin in the water
- Let wool dry completely between uses
- Check for wear and tear
Fitted Nappy Fit by Baby Size
Small Babies (5kg-8kg)
- Use tightest leg snap settings
- Covers might seem big - that's okay!
- Less absorbency needed = easier fit
Medium Babies (8kg-13kg)
- Sweet spot for fit
- Usually middle snap settings
- Covers fit nicely
- Can use maximum absorbency without too much bulk
Bigger Babies/Toddlers (13kg-18kg)
- Use outermost snap settings
- Less overlap at waist
- Need bigger covers
- Might need the most absorbency
Quick Fitting Checklist
Save this checklist to check your fit:
For Mighty Minky:
□ Rise setting right for baby's size
□ Nappy centered on baby
□ Waist snaps give snug but comfortable fit (two fingers)
□ Leg elastic in the crease, no gaps
□ No inserts poking out of pocket
□ Baby can move freely
□ No red marks that last more than 20 minutes
For Heavy Wetter Fitted + Cover:
□ Fitted nappy has snug leg elastic in crease
□ Fitted waist is snug (two fingers)
□ All absorbency is positioned correctly
□ Cover completely covers all fitted fabric
□ No fitted fabric sticking out anywhere
□ Cover has good seal at legs and waist
□ If using wool, it's freshly lanolised
□ Baby can move comfortably
Tips for Fitting Success
1. Practice during the day first Fitting bulky night nappies takes practice. Try them during daytime naps before using overnight!
2. Size up PJs Night nappies are bulky. Baby might need PJs one or two sizes bigger than normal.
3. Check fit as baby grows What fit perfectly last month might need adjusting now. Check the fit every few weeks.
4. Take photos When you get a good fit, take a photo! This helps you remember exactly how it should look.
5. Give it time The first few nights might feel tricky. By night 5, you'll be a pro!
6. Ask for help Post fit check photos in our Facebook community. Other parents can spot fit issues you might miss!
When to Adjust the Fit
Baby grew or the fit isn't working anymore? Look for these signs:
🔴 Tighten the fit when:
- You see gaps at legs or waist
- Nappy seems loose or saggy
- Getting leaks at the edges
- Nappy slides down during the night
🔵 Loosen the fit when:
- Red marks last more than 20 minutes
- Baby seems uncomfortable
- Snaps are pulling tight
- Baby is fussy about nappy changes
🟢 Change rise settings when:
- Too much fabric bunching in the crotch (go longer)
- Can't get snaps to reach (go longer)
- Gaps at the legs (go shorter)
- Baby has grown and snaps barely reach
The Bottom Line
Getting the perfect fit takes a little practice, but it's SO worth it! A well-fitted night nappy means:
- Dry baby all night long
- Dry sheets and PJs
- Better sleep for everyone
- No middle-of-the-night changes
- Happy, comfortable baby
The key things to remember:
- Leg elastic must sit in the leg crease (no gaps!)
- Two-finger test at the waist
- For fitted nappies, ALL fabric must be inside the cover
- When in doubt, size up covers
- Wool must be lanolised to work
- Practice makes perfect!
You've got this! 💪
Ready to get started?
Shop Mighty Minky Night Nappies →
Shop Heavy Wetter Fitted Nappies →
Shop Waterproof Covers →
Shop Wool Covers →
Browse All Night Nappy Products →
Need more help? Join our supportive Facebook community, check out our FAQ page, or read our complete night nappy guide!


Leave a comment
All comments are moderated before being published.
This site is protected by hCaptcha and the hCaptcha Privacy Policy and Terms of Service apply.